After several cycling tours, even some multi day excursions with our bicycles, we always ended up talking and dreaming about a real long distance tour with the whole equipment.
We already had some hiking gadgets that could be used for such a tour (tent, sleeping bag etc), but a real touring bicycle was required. After I had sold my trekking bike, I started to look for a new touring bicycle. Generally, I had two options: buying a new one, or to build up a custom one meeting my requirements.
Buying a complete bicycle is in average cheaper than buying all of the components part by part and building up a custom one. However, the experience that you can gain during a custom assembly is unaffordable and such an experience is generally required on long tours, far away from home.
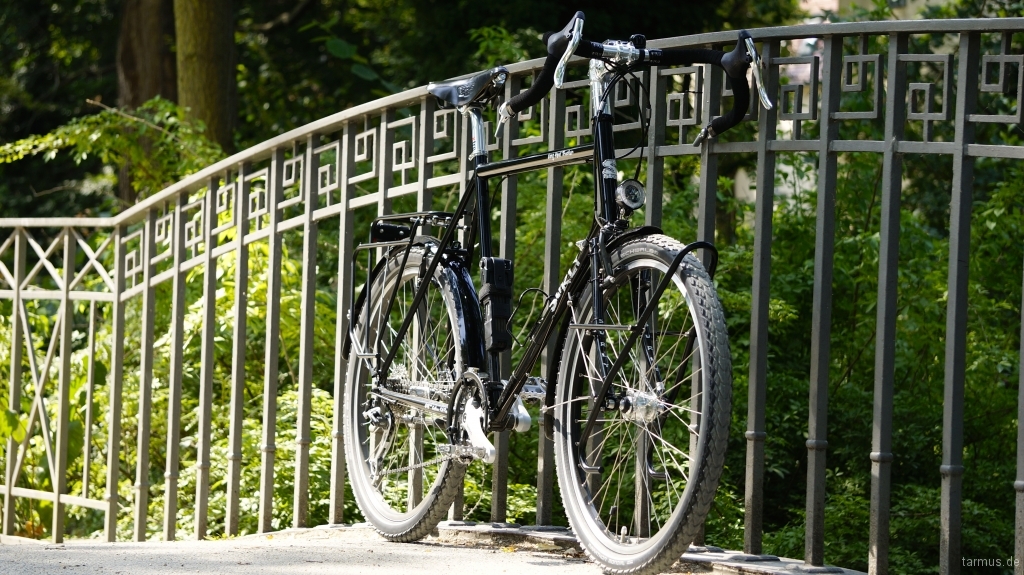
Surly Long Haul Trucker 26″
Searching for information on custom touring bicycle setup online, I came across the Bicycle Travel Forum, where many cycle touring experts share and exchange their knowledge. Martin Moschek is one of them. He posed an online survey containing 46 questions on the forum, by collecting the characteristics of “the” touring bicycle. The survey was very convincing to me, because very experienced touring cyclists participated. All of the results have been published in a extensive and nice presentation (Touring Bicycle Part I, Touring Bicycle Part II).
With respect to the mentioned evaluation, a touring bike consists of the parts listed below. My preferences are bold and underlined, whilst parts not mentioned in the survey, but still interesting for my own assembly, are put in [square brackets]:
- Frame:
- Size: 26″, 28″, 29″
- Material: Steel, Aluminium, Titan
- Fork: Fixed, Suspension
- Geometry: Trekking, MTB, Randonneur, Cross
- Wheels
- Rims manufacturers: Ryde/Rigida, Mavic, DTSwiss, Exal
- Tires manufacturers: Schwalbe, Continental
- Brakes
- Types: V-Brake (mechanical), V-Brake (hydraulic), Disc Brake (hydraulic), Disc Brake (mechanical)
- Manufacturer: Magura, Shimano, Avid
- Saddle
- Manufacturer: Brooks, Selle Royal, SQLab
- Seatpost: Fixed, Suspension
- Gearing system
- Types: Derailleur Gears, Hub Gear, Pinion
- Drive: Chain, Belt
- Hubs
- Rear hub: Shimano, DTSwiss, Chris King, White Industries
- Front hub: SON28, SON Deluxe, Shimano XT, [Shutter Precision]
- Bottom Bracket and Crankset
- Bottom Bracket: Square Taper, Hollowtech II
- Crankset manufacturer: Shimano, Truvativ, Sugino, Sram, FSA, Campagnolo
- Handlebar
- Stem: Fixed, Adjustable, Suspension
- Headset: Chris King, FSA, [Acros]
- Handlebar forms: Flat with bar ends, Drop Bars, Multibar, Flat without bar ends
- Pedals
- Types: Dual Platform, Clip-less, Clip
- Mudguards
- Types: Fixed, Clip-on
- Racks
- Rear rack manufacturer: Tubus, Racktime
- Front rack manufacturer: Tubus
After a wide research about touring, many read blogs and forum entries from touring cyclists, I found myself looking for a 26″ steel frame that could be built up as a randonneur. A randonneur handlebar allows different cycling positions and gives variety on long distance tours.
On my short list I had the following bicycle frame manufacturer, who all have good reputation within the touring domain:
To make it clear and short: all the mentioned manufacturers provide great bicycles and frames. When contacting them, they are all very friendly and willing to answer all your questions. However, I decided to build up my very own Surly Long Haul Trucker. The reasons for my decision ware the following:
- Roadbike Feeling: I have a roadbike and I like it. Surly is manufactured for drop bars and many cyclists have confirmed its roadbike friendly frame geometry. Besides Surly, Thorn Sherpa also provides two different top tube lengths for their bicycles. Other frames can be used with drop bars as well.
- Price: Compared to the Surly frame, all other frames cost 200-300 Euros more in average. Special configuration on the frame, like the extension of the top tube, costs a bit more. A custom built frame would obviously be the best fit, but comes with an even bigger price-tag.
- Test drive: Generally it is difficult to test drive with the mentioned bicycles in the required size. On the Bicycle Travel Forum one of the participants offered me to test his Surly Long Haul Trucker. From the beginning, I liked the cycling position. It was the final peace leading to my decision.
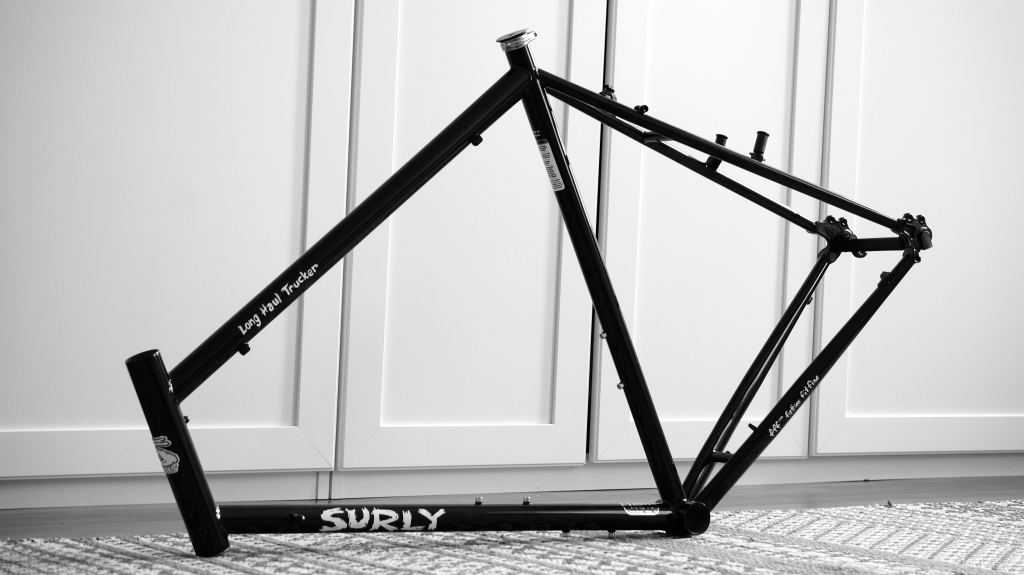
Surly Long Haul Trucker Frame
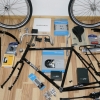
In the following time, I searched for Surly LHT custom builds that I could find online in order to evaluate which parts I would buy. The assembly of Frank Bauer was very well documented, and I got many ideas for my Surly LHT set-up. Frank was also very helpful by answering my open questions. I defined my list of components and posted it for a check on the Bicycle Travel Forum. Receiving many suggestions and tips on which components I should consider to use or to change, in the end I came up with the following list:
| Component | Specification |
|---|---|
| Frameset | Surly Long Haul Trucker 26", 58cm, color: not so dark black (2014) |
| Headset | Acros AH-03 EC34/28,6 – EC34/30 S.H.I.S. |
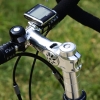
| Stem | Kalloy Uno, 90mm, 7°, 25,4mm clamp |
| Spacers | Xtreme Alu Tri Spacer, 35mm, silver |
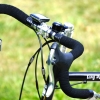
| Handlebar | Nitto B-135 AA Randonneur, 450mm, 25,4mm clamp |
| Handlebar Tape | fi`zi:k Microtex Superlight |
| Levers | Tektro RL520 Drop Bar |
| Brakes | Avid Single Digit 7 V-Brake |
| Brake Cable | Shimano Road Brake Cable Set with PTFE Inner Cable |
| Brake Cable Adjuster | Shimano SM-CB70 |
| Seatpost | Xtreme Pro Double Bolt Racing, 300mm, 27,2mm clamp |
| Saddle | Brooks B17 Standard |
| Bottom Bracket | Shimano BB-UN55 Square Taper, 122 mm |
| Cranckset | Shimano Acera FC-M391 with trouser guard, 22-32-44, 175mm, 3x9 |
| Rear Derailleur | Shimano XT RD-M772-SGS, 9 speed |
| Front Derailleur | Shimano Deore XT FD-M770 Top Swing, 28,6mm clamp |
| Bar End Shifter | Shimano Dura Ace SL-SB77, 2-/3 speed front, 9 speed rear |
| Shift Cable | Jagwire Universal Sport Shift XL kit |
| Cassette | Shimano Alivio CS-HG400, 9 speed, 11-32 |
| Chain | Shimano CN-HG53 |
| Pedals | Shimano PD-M324 |
| Front Hub | Shutter Precision PV-8, 36 holes |
| Rear Hub | White Industries MI 5 Racer 36 holes |
| Spokes | Sapim Race 2.0/1.8/2.0 |
| Spoke Nipples | Sapim Polyax Brass Nipples 2mm |
| Rims | Ryde Rigida Sputnik |
| Rim Tape | Schwalbe 26" High Pressure |
| Tires | Schwalbe Marathon Mondial Evo 50-559 |
| Tire Tube | Schwalbe 26" AV13 |
| Rear Rack | Tubus Logo Evo |
| Front Rack | Tubus Tara |
| Front Headlamp | B&M Lumotec Lyt T Senso Plus |
| Back Light | B&M Toplight Line plus, 50mm hole spacing |
| Rear Stand | Hebie 611 |
| Mudguards | SKS Blumels, 60mm |
| Bell | Mounty Special Billy, 25,4-26mm clamp |
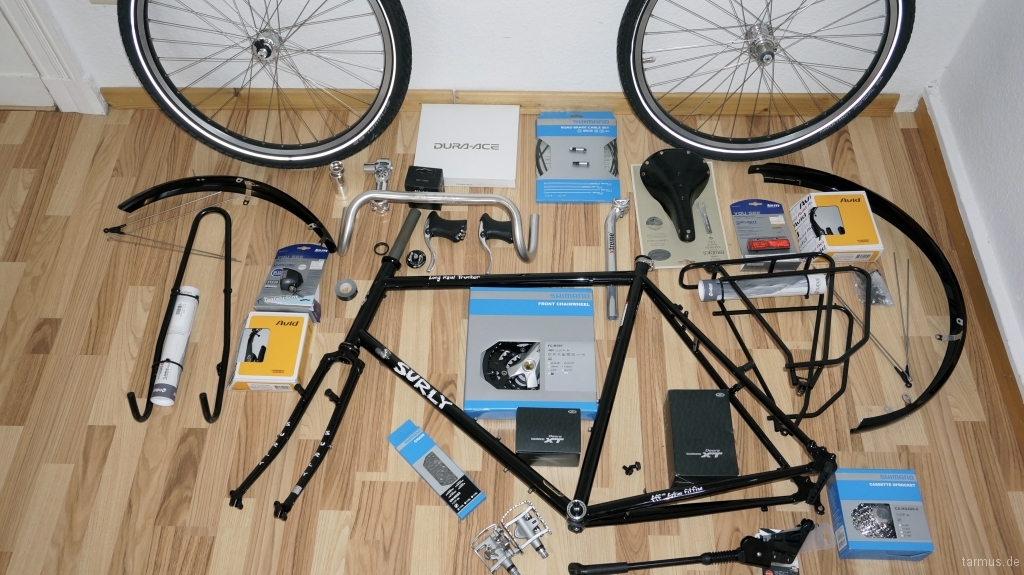
Bicycle components for the Surly LHT assembly
Finally, it was time to buy all of the required components. With respect to varying prices, I bought the components from different Online shops, like Bike24, Wiggle, Cycle-Basar, Bike-Components, Bike-Discount, Ebay, Meilenweit, Rose. For example, I bought the frame set from Bike-Components. The brakes, bar end lever set, and rear derailleur came from Wiggle. Most of the other components have been bought from Rose, because of a special discount campaign, 20% off on bicycle parts, during that time.
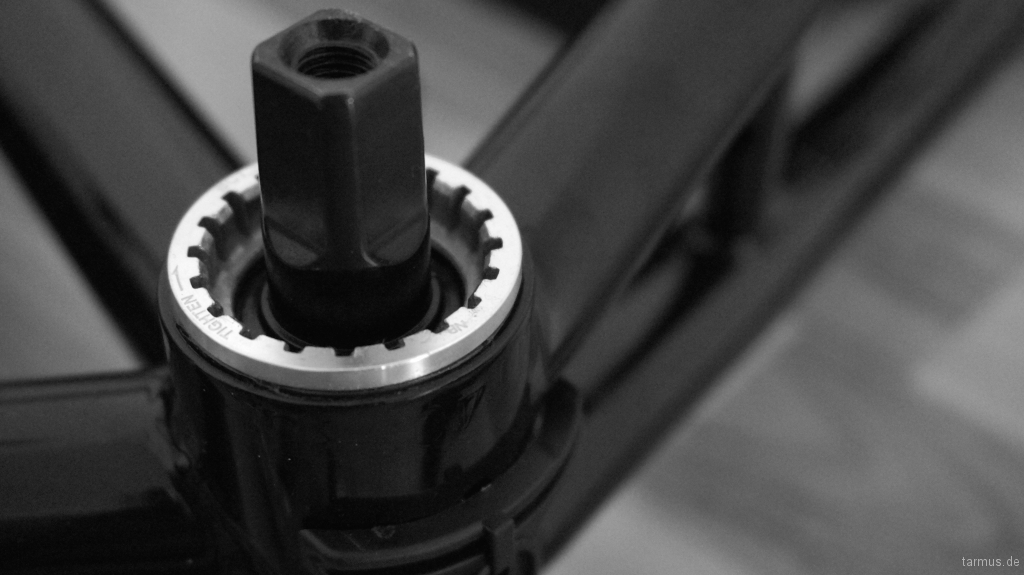
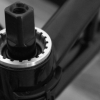
Installed Square Taper Bottom Bracket
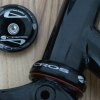
In the beginning, the installation of the bottom bracket, headset, and cutting the fork worried me. In my opinion, these are the most difficult and critical steps of an assembly, because they require special tools. Of course, I had the option to let it be done by Bike-Components or any other local bicycle repair shop for some money. However, one of my preferences was to assemble the bicycle completely by my own, or at least with someone helping me a bit by showing me how things are done.
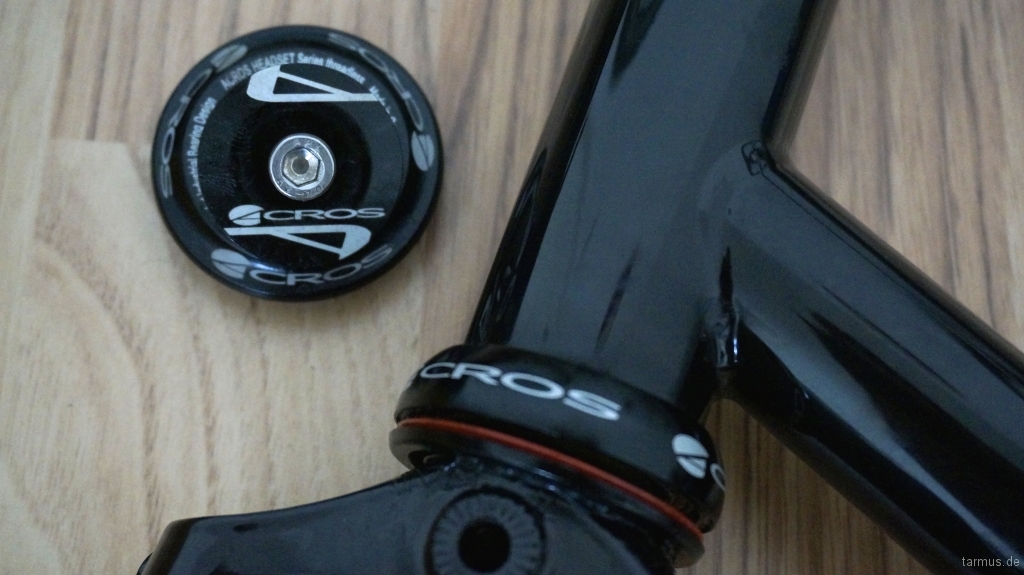
Installed Headset
The German Cyclist’s Association (ADFC) provides interesting bicycle workshops and open their repair shops during specific days for free. There, most importantly, you meet with experienced cyclists, who can help you. In my case, I met friendly helpers, who supported me with several tips and suggestions. In that way, I was able to do the installation of the bottom bracket, the headset, and cutting the fork on my own, but always with a companion.
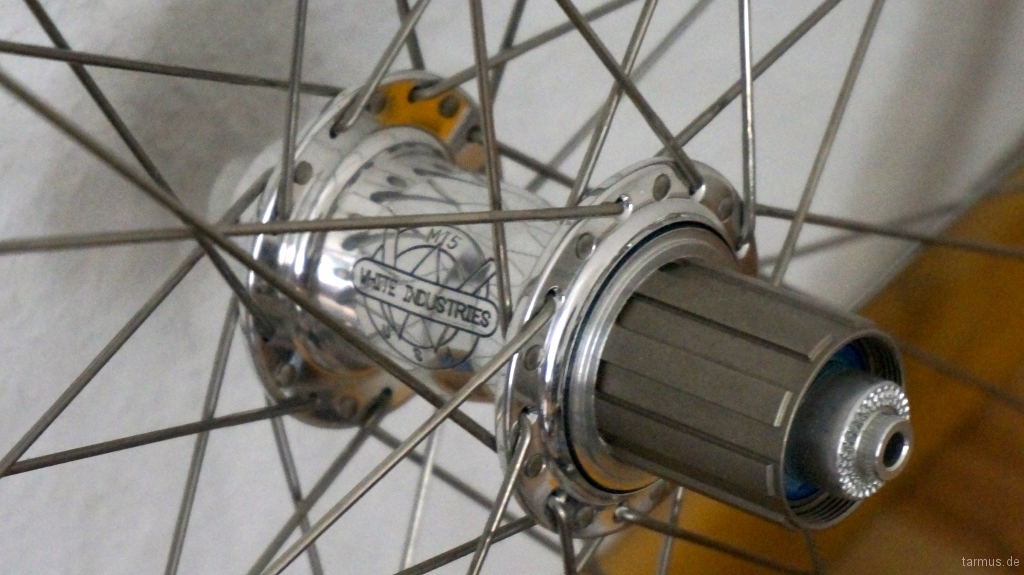
Spoked rear wheel with the White Industries Mi5 Rear Hub
Although I visited a wheel-building workshop at ADFC, I decided to let the wheels be built by someone else. I asked the following shops for a price with provided hubs:
The addressed shops differ in their price models when providing your own existing components, like the hubs in my case. After my evaluation, I decided to let my wheels be built at Meilenweit.

Spoked front wheel with the Shutter Precision PV-8 hub dynamo
After I had the first draft version of my assembled bicycle, it was time to cut down the fork steerer tube. Since I didn’t have the required equipment to do that, I visited the ADFC repair shop again and did it there. I decided to let the fork be a bit longer, until I had found my preferred position.
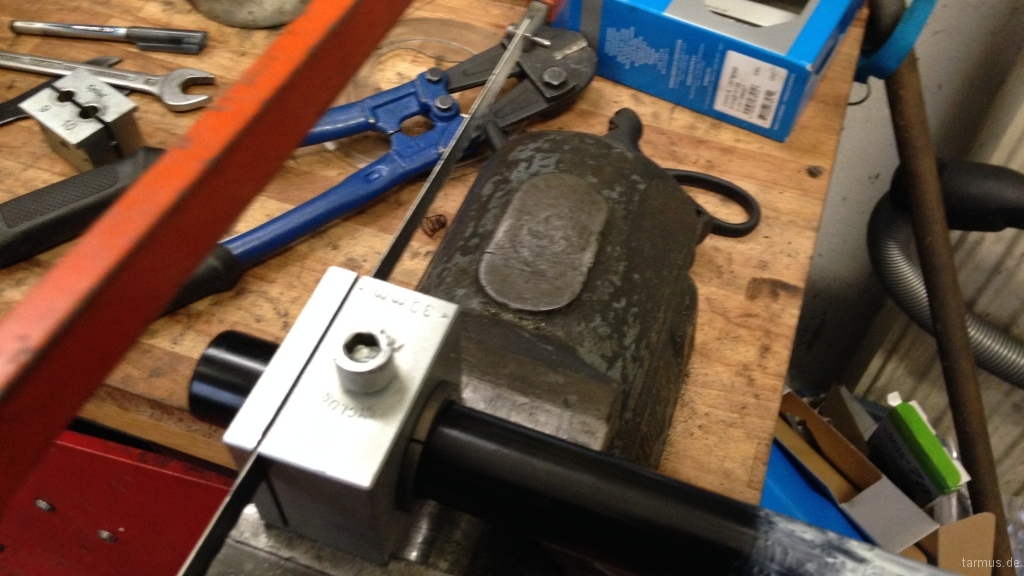
Cutting down a fork steerer tube
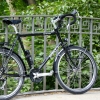
The rest of the assembly was really straight forward. The Bike-Bastl-Wastl Workshop on YouTube helped me a lot to get a feel for how a bicycle is build up from scratch. Below, you can find some pictures of my assembled Surly LHT.
As a final remark I want to say that a self-assembly takes time and requires patience. That is in the end also money, when comparing to your own working hours. Furthermore, the self-assembly costs in average a little more than ready built bicycle off the rack. The experience, however, that one gathers is in my view, priceless.
I am currently trying different fork lengths with my adjustable stem. The Stem Comparison Tool helped me a lot to understand the differences. When I get my final fork length I will cut down the fork if required and replace the stem with a fixed one.
Update: After about 700km of cycling and testing different stem angles and spacer sizes I came to a spacer length of 35mm by leaving the stem at 0°. I left one 10mm spacer above the stem for backup.
Update: I replaced the adjustable stem with a fixed one (90mm, 7°). Spacer length as before (35mm).








i like the custom build of your surly lht. If i may ask, what is your frame size.
I’m 5feet 7inches or 172 cm height and looking for 50cm frame as suggested by my local bike sho, thank you.
Hi JonWen,
thank you very much for your feedback. The frame size of my Surly LHT is 58cm (see specification table).
Regarding the frame size, you can spend time and time with calculations and measurements. At the end, you will find out that there is not only one calculation result.
I would recommend to calculate the frame size based on your body measurements just to get an orientation. There are certain factors (different for each bike category: road, MTB, trekking, …) that are multiplied with your inseam and provide a frame size in cm. In my case, my inseam is 87cm and I am 188cm tall. The factor for a trekking/touring bicycle is 0,66. That lead us to the following calculation in my case: 87 * 0,66 = 57,42 cm. As already mentioned, I have chosen the frameset with 58cm. Online you can find several illustrations how to calculate your inseam. Here (Frame Size Calculator) you can choose “Trekking/Travel Cycle” and also perform the calculation. You can check if your inseam and height match the approximate values in the table.
As already mentioned, this are approximate values just to get a direction, which frame size could fit. You need to take into consideration that provided frame sizes are only referred to the length of the seat tube on a bicycle. It is very unlikely that a single number can represent the frame size in general. With a seatpost you can easily compensate 1-2 cm. The top tube length is more important than the seat tube length. In your case, you should check your inseam to height ratio: do you have average, long, or short legs? Based on that you can decide what top tube length you need for your cycling preferences. This also have an impact on what type of handlebars are you going to use (drop or flat). Many Surly LHT users say that the geometry of the LHT is working best with drop handlebars. But there are users using flat handlebars as well.
There is Surly LHT spreadsheed online, where several Surly LHT owners entered their body measurements, their chosen frame sizes, their modifications, and their experiences (Surly LHT Size Spreadsheet).
In summary, with the calculations and the spreadsheet you can come to a starting point. However, I would highly recommend to find someone with the desired frame size and ask him or her to test it. If you have a similar bicycle with a geometry that you like, you can take it as an orientation and ask someone from your local bicycle shop to help you to come to a similar geometry on the Surly LHT.
If you want to read more about frame sizing, check this article from Sheldon Brown: http://www.sheldonbrown.com/frame-sizing.html
I hope, I could help you.
Hello JonWen
I am in the process of assembling an LHT.
I have found that the seat tube slides, the clamp can not tighten more.
How did you solve that problem?
Cheers
Matthias
Hi Matthias,
happy to hear that you are assembling your LHT. Regarding your question: the topic is discussed by Surly on their website in the following blog post: Why seatposts slip?
Regarding my assembly: I had experienced a slight slipping in the beginning phase, but it ended very fast. I don’t remember the exact reasons, but here is what I did differently from the out-of-the-box situation. Firstly, I wanted to put Pitlocks on my bicycle (including seat post clamp), I bought a new saddle clamp that is both plane and parallel, because the original one from Surly didn’t work with Pitlock. In addition to that, I have used the assembly paste with micro pearls from Dynamic to prevent the sliding: Dynamic Assembly Paste.
So, my suggestion would be to try a different seatpost clamp and/or try the assemply paste.
Hi Merisa & Tarik,
Do you have any idea why the head tube is longer on the version/model of your LHT than the LHT that is currently available/pictured on the Surly website?
Hi Alex,
the head tube length of my Surly LHT is 222mm (26″, 58cm), which totally match the provided length on Surly webpage (see geometry tab, 26″). I assume that the LHT pictured on the Surly website represents the 28″ version, because the head tube length of a 28″ (58cm) LHT is a little bit shorter (171mm).
I really like your bike looks beautiful, I just wanted to ask you is there an specific reason you went for the lower end Shimano Acera Crankset? I can see that you splashed out on some pretty expensive hubs and then went for the very low cost shimano acera crankset as I can see by the other components money was not an issue I am planning on building mine and I am gathering as much information as I can, I am not criticising your choice of crankset I am just trying to understand the reason you went for it wouldn’t a shimano xt,slx or deore be a better choice?
Thank you.
Hi Jonathan,
thank you very much for your feedback. As you correctly stated, there was a kind of cost transition from ‘high-end’ to ‘best-value’. Initially, I wanted a Surly LHT with a White Industry rear hub, Schmidt SON28 front hub, complete XT group set, etc. I soon came to the point that such a combination would reach the price range of a bicycle equipped with a Rohloff rear hub. So I started to tune a bit on my component list. I asked the experts from the German Bicycle Travel Forum for their opinion. We came soon to the point that a Shimano Acera or Alivio cranckset will do exactly the same job as a XT cranckset. At that time a Shimano XT cranckset with trouser guard cost about 160 Euros. In comparison to that, a Shimano Acera FC-M391 with trouser guard cost about 30-40 Euros (Alivio even less). The same is with the cassette and chain. A Shimano bottom bracket (e.g. BB-UN55) you can get for 12-15 Euros. All in all, these components are articles of daily use that will be replaced from time to time. That’s the reason why I decided to choose a ‘best-value’ strategy. The rear and front derailleurs are XT, because they shift smoothly and work perfectly with the other components. The most expensive component on the bicycle, as you correctly stated, is the White Industries rear hub. This was the first component I bought some years ago, because I came across a special online offer. If you ask me what I would buy today, I think that a XT or LX rear hub would do the same. But I must admit, today I really like the polished silver finish and the great freewheel sound of the White Industries MI5 rear hub :)
I can’t say if XT, SLX or Deore would be a better choice regarding the cranckset. In my case, I was looking for a Square Taper bottom bracket. In that way, the choice of crancksets is quite limited. If you are more a road bike cyclist, maybe you should take Shimano Hollowtech II (Deore, SLX, XT) into consideration.
Thank you for your honesty, I just ordered my parts and I am so excited I cannot wait to start building, I ended up with the same dilemma not wanting to spend too much because if you buy everything off the best components you will enter Rohlloff territory and at the moment I cannot spend over 2000 Euros in a bicycle, I took your advice and bought the Deore Hollowtec 2 (£56 pounds on Rose Bikes) and the XT hubs and derailleurs, also went for the Sputnik rims with Mondial tyres, I did splashed out on the lights as I went for the Bush Muller Lumotec IQ2 Luxos U as it comes with USB charger for smart phones and GPS, the rest is pretty much standart stuff I found on sale online, my total buit cost will be around the same price as if I was to buy the stock version of the Surly LHT what in my opinion made building one much more sence as the components I used are much better.
Thank you very much for taking the time to make this blog it is very helpful.
Nice to hear of your progress. Just two additional remarks from my side. First: According to your Hollowtech II bottom bracket decision, you may need to do some preparation to your frame (shell facing / milling). Second: If you plan to use your bicycle in all weather conditions, maybe you should do something for the internal frame corrosion protection/prevention by using ‘Fluid Film AS-R 400’ or similar product. I recommend to do that as a first step before building up the bicycle. Good luck!
What do you mean by shell facing/milling the frame will it not fit the hollowtech II bottom bracket without any frame alterations?
It depends in which condition your bottom bracket shell of the frame will be. In order to work perfectly, Hollowtech II bottom bracket bearings presuppose that the faces of the bottom bracket shell are flat and parallel. Otherwise, you can have some problems later on. Often the bottom bracket shells are not totally flat or are covered by the frame color varnish (like here). In that case you need some preparation (like here), e.g. by using a bottom bracket tapping and facing tool set. An example is shown in this YouTube-Video. But be aware that too much tapping and facing can damage the total width of the bottom bracket shell and in worst case scenario ruin your frame. You can ask your Surly frame dealer to do that for you before sending the frame. But be aware, if they do such kind of modification, you can’t send the frame back if you don’t want it! Another option would be to take your received Surly frame, check it in detail if everything is fine (if not you can send it back) and then go to a local cycling shop and let them do the bottom bracket shell preparation for you. In both cases you can expect 20-30 Euros to pay, which is quite cheaper than a bottom bracket tapping and facing tool set.
Thank you very much for your tips and sorry to bother you so much, but your knowledge is very helpful especially for me as I never build a bike before, I think my frame is very straight I hope I will get by just by scrapping of the paint of, I just wanted to ask you if your brakes interfere with the mudguards, I heard that V Brakes might be incompatible with fat tires and mudguards on the frame if you would build your bike again today would you go for cantilevers or V brakes again?
Thank you
In my case, I don’t have any interfere with my brakes and mudguards. I also didn’t hear from others that they might have problems with Avid SD 7 brakes with similar configuration. I assume that it is the same with XT V-Brakes, because several Surly LHTs roll with them. And, I would go for V-Brakes again.
Hello,
After installing Hebie 611 stand, are you seeing any damage on your chainstay? According to Surly, installing a stand on chainstay will damage it over the period of time as the chainstay is not strong enough to take a weight of a fully loaded bike.
Thanks in advance
Hi Rohit,
I don’t see any damage on my chainstay. However, I am also aware of Surly’s statement about the usage of a kickstand. Therefore, during the installation, I used the least amount of force necessary to keep it from moving around or coming loose (as recommended). I also put a transparent sticker under the kickstand arms (around the chainstay) to protect the frame paint. And I never use the kickstand with fully loaded bicycle. If the bicycle is loaded, I lean it against a wall, tree, etc. or put it on the ground.
Thank you so much for a quick response. I can now add this stand to my LHT components list.
A follow up question: What panniers are you using on your tubus logo evo? I am leaning towards Vaude Aqua as I am not sure if Ortlieb’s back roller classic bottom hook(i.e. shark tooth) will secure with logo evo. Any thoughts?
All my panniers are from Ortlieb (Front Roller, Back Roller, and Ultimate 6). The Ortlieb Back Roller have an elliptical hook rail with rotatable QL2 hook (45° steps). The hook can be positioned either in upper or lower part of ellipse. In that way you have enough space to find the right position. However, I can’t compare it to a Vaude hook system, because I only know the Ortlieb panniers.
Thank you.
Hello Merisa & Tarik
I am currently also in the process of building up an LHT myself and this great article is one of the few that I am using as the basis to start my own building efforts.
Now that you have had the chance to test your bike out over a 2 year period, are there things that you wish you would have done differently ? Have you meanwhile made any changes to the setup (due to wear & tear or due to you not happy with the initial choice) ?
Thanks in advance
Kris
Hi Kris,
thank you very much for your feedback and your interest in our blog post.
I cycled about 5000 km with my LHT so far. And I must admit that I am very happy with the configuration. During that time, I haven’t change almost anything. I have played a bit with the stem angles and lengths to achieve a more comfortable position – but this is just my personal preference.
Regarding the wear & tear components I haven’t changed anything so far. I have two chains that I change after every 2000 km. In that way, after 8000+ km, I am planning to change the cassette, maybe some crankset rings, get two new chains, and a new bottom bracket if required. I know there are people cycling 20.000 km with the initial setup, but I like it running smoothly ;) But the components are quite good and, as you can see, for the wear & tear parts I have chosen the more affordable parts.
What I plan to replace when the time is ready, are the brake pads. I just want to give it a try and test the Kool-Stop brake pads with the black and salmon color. This Dual Compound of black and salmon is said to provide better brake performance in all conditions. But I have no experience so far. I mean, I was able to brake in each condition with my brake pads as well, even with load, but maybe the Kool-Stop brake pads will provide even more grip under rainy conditions.
If you are still in the initial phase of building up a bicycle from scratch, maybe you should think about disk brakes. A lot of touring cyclist see the disk brakes as a standard today for a touring bicycle with heavy load and for all weather conditions. Even on road bikes, you will find more and more disk brakes in the future. This is very important to think about at the beginning phase, because the decision will have a direct impact on many other components, like the frame and the fork, front/rear hub, brake levers, etc. At the beginning of my assembly, my first components had been the rear and the front hub predetermined for the rim brakes. In that way, it was a kind of predefinition for my assembly. Maybe this is the only point that I would do differently with my LHT. But as I said, so far I am very happy with my configuration and I do not plan to change the fork, the front hub, the front wheel, just to get the disk brakes for the front wheel (which actually some people do to get a better stopping performance).
I hope it helps. Good speed!
Thank you ! I have also chosen the regular LHT (so no disc brakes) as we (my wife and myself) are planning to use it for a trip towards Asia and we decided to go for common components which can easily be replaced in remoter areas. Just like you did, I am also building them up myself through a bike mechanic course in evening school, which is a great experience so far.
Koolstop dual compound brake pads are already on my list as well to be placed from the start. I have read a lot of good comments about these.
The parts I am really still in doubt with for the moment are the bars and the fenders. For the bars on my bike, I am still biased to dropbars / Nitto Randonneur (B135AA) for the moment but I am not yet 100% sure yet. For my wife, who has the smallest available LHT model (42″) I might actually go for a butterfly model.
I have read some bad comments on other blogs about the long-term quality of the SKS mudguards and I considering stainless Gilles Berthoud ones instead.
I am happy to hear that you are overall happy with the setup. I can’t wait to ride ours :-)
Hello Merisa & Tarik,
Excellent build, thank you for sharing it with us! One question. You specify bottom bracket to be 122mm while on the Surly website it is 68x118mm. Where is the difference coming from?
Hi Kalpazan,
thanks a lot for you comment. Regarding your question, I have chosen the 122mm bottom bracket length, because it is recommended by the specification of my Cranckset I have chosen (Shimano Acera FC-M391). The idea behind that is to have a proper chainline. This is also what Surly recommends here in their blog entry about Bottom Bracket Sizing.
I could imagine that it would work with a shorter bottom bracket length (not tried out and would not recommend), but it it could also lead to a bigger attrition of the components with respect to a “not proper” chainline.
Hope it helps.
Hi,
Thank you for your comment. You are absolutely right. I did not think about the chainline.
Happy journeys!
This is the best write up I’ve seen so far on how to build your touring bike.
Thank you so much for sharing your knowledge.
I’m from Luxembourg and I’m about to build my Surly too.
Are you still happy with your setup?
Thanks again
Hi Christophe, thanks a lot for your kind words. I am really happy to hear that the blog post is helpful to others. To answer you question: I am still very happy with my configuration and it is the same. Regarding this questions, please also check my response to Kris’ comment.
How is your setup rolling after 5 years planning to build my LHT with a raer hub like yours and mainly Alivio parts. Do you have any photo’s of the bike today?
Hi Karel, how to say – the setup is rolling ;) I must admit that my cycling ambitions dropped a bit in the last 2-3 years (business related, child birth, etc.). Generally, I am using the bicycle for day trips in my surrounding. In total, my Surly LHT has about 5.000+ kilometres so far.
Regarding setup changes: today, I am using the bicycle seat for children (Thule RideAlong) with two different adapters – one is on my LHT, the second on the bicycle of my wife. In that way we can take our child with two different bikes – depending on the situation. I like the Tubus Logo Evo rear rack in combination with the Thule RideAlong, because I can now take the child seat with two Ortlieb rear panniers without any problems, because the panniers are placed much lower with Tubus Logo Evo (not possible on the other bicycle). In the near feature, I am planning to change my drop handlebar. I really like the classic looking Nitto B-135 AA Randonneur drop bar, but I guess that the reach of that handlebar is a bit too long for me. Therefore, i will try another drop handlebar and check if it is better, in particular when trying to reach the brakes. I have analysed several drop handlebars that come into consideration, which you can see here (Link-to-Image). Since there are not so many drop handlebars that are silver and having a 25.4 clamp, I have decided to go with standard 31.8 handlebars. During the evaluation, I have decided to purchase the “Race Attack GF Aero” drop handlebar, because it is similar to the Salsa Cowbell and was available for much less. But this is something I am going to try when the handlebar tape, shift/brake cable, etc. is ready for replacement.
And regarding your question, here are some pictures from March, April, June 2020: Link-to-Images. Hope it helps.
Beautiful bicycle trying to build exactly the same, this one is my blueprint, please send me a pm with all the parts.
Hi Tarik,
your article gave me some inspiration for the setup of an own LHT.
I decided to go for AVID SD7 v-brakes as well.
when installing, noted that they didn’t fit exactly/tight on the socket.
learned this from a ‘rad-forum’ comment as well.
that correct? did you make same experience?
your advice / comment very appreciated
Hi Holger,
nice to hear from you that you are setting up your own LHT. Regarding your question, if I remember correctly, I also had the feeling that there was some small space, but nothing special. The brakes are fixed with a torque wrench and they can’t slip out. So far I had no problems with that.
Some people are calling this wobbly characteristic as “design” (Link). Others suggest to compensate the space with some washers (Link).
I don’t know how is it in your case. If you feel unsafe, maybe you should switch to an alternative brake (like Shimano XT). I have my SD7 still on.
Regarding the Avid SD7 brakes, maybe you are already aware of that, but there was a Safety Recall Notice for some models. Maybe you should check this as well, if your brakes are also produced during that time. Here you can find more details (English-Link, German-Link).
Hope it helps.
HI Merisa Hi Tarik,
thank you for your reply and the hint regarding Safety Recall Notice. Was aware of it and asked dealer in advance to check date of production.
‘I have my SD7 still on’ keeps me going on with this brakes. Yes, it helped
rgds
Hello I am Nick from Greece. I read your post and thank you for sharing. I want to build a commuting-touring bike for myself initially and I most certainly like the idea of building a long haul trucker on my own. Do you think that the 58 cm frame will do for myself? I’m 185 height and 84 cm inseam. Unfortunately I can’t see availability in 56 cm frame and here it’s almost impossible to find one for test ride.Thank you in advance.
Hi Nick, thanks for contacting us! Happy to hear that you are going to build your own Surly LHT. It’s a great experience. Regarding your question, it’s difficult to answer, because the best way would be to try both sizes. Just to give you an idea: my Surly LHT is in 58cm and I am 188cm with a 87cm inseam. I have the impression, that I could go with a shorter frame as well (e.g. 56cm). Keep in mind, Surly LHT is well known for its relatively long top-tube and it’s geometry is optimised for Drop Bars. If you are going with drop bars as well, you will have plenty of reach with a standard randonneur drop bar. In my case I am starting to use shorter stems to compensate that, but I also plan to put another drop bar on my Surly LHT with a shorter reach. Since your inseam and your height is below my, I would go more for a 56cm frame in your case. But as I said, it’s only my opinion, without any evident facts. If you want to be more in a upright position, then 56 cm would be quite good. But if you really like the stretched out Randonneur position, maybe you could also find your way with a 58cm frame. Here is also a public Google Spreadsheet, where you can find the height and inseam length of other Surly owners and their comments on choosing the size – check the guys with similar measurements: Link. I hope it helps. Good luck with your LHT.